WDPro was Kuma Computers' word processor for the Tatung Einstein, written by Dr B. R. Gladman and published in 1984. It works differently from Tasword, and from anything you are likely to have used since. You don't arrange the page on screen. You type your words in one continuous stream, drop in short commands that say where a paragraph starts, what to centre and what to underline, and WDPro lays out the page when it prints. If you have ever written a web page in HTML or a document in Markdown, you already know the idea.
This guide takes you through using it today, on a real Einstein or under MAME: starting the program, typing and correcting, getting about, moving text, find and replace, saving and loading, formatting, and what printing means when almost nobody has a printer the Einstein can talk to. Everything in it was done on the machine, in MAME, with the copies in our library: the WDPro disc and the WdPro Word Processor Manual. Where the manual and the machine disagree, the guide says what the machine did.
A real Einstein needs the WDPro disc, and nothing else. The library's copy is a .dsk image; the Einstein Disc Tools will get it onto a real floppy, or an SD card interface will take it as it is. The disc starts the Einstein by itself, so there is no need to boot a System Master first.
MAME needs the Einstein ROM and the disc, set up as in Setting Up MAME. As with any program that saves to its own disc, MAME will not write to a .dsk image. Try to save on one and WDPro gets this:
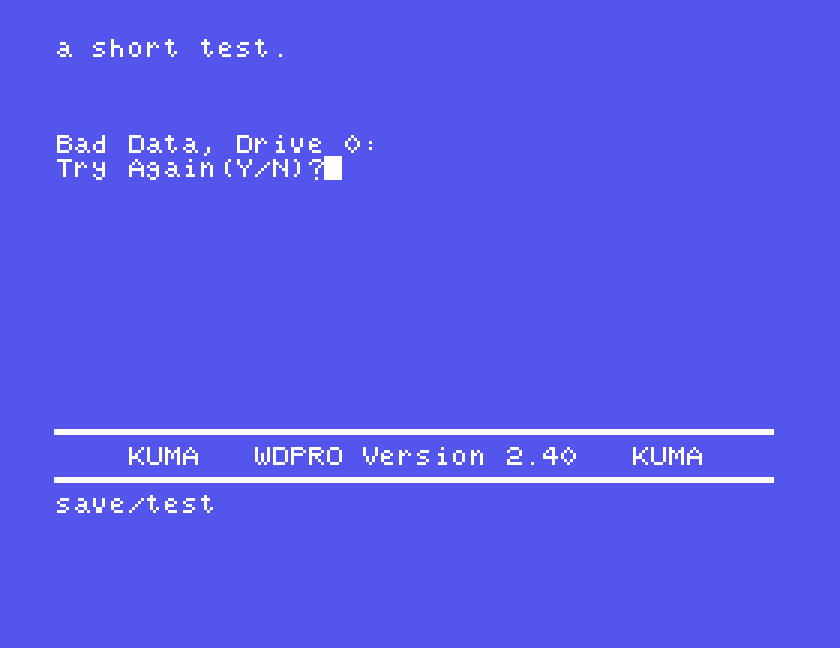
Answer N and you are thrown out of WDPro to the DOS 0: prompt. When we typed WDPRO again, the text we had typed was still there, but don't count on it: convert the disc to MAME's own .mfi format before you start, and the problem never arises. DSK, MFI and SCP explains the formats, and the Einstein Disc Tools do the conversion in one command. Then start MAME with the converted disc in drive 0:
mame einstein -window -flop1 wdpro.mfi
Keep a spare copy of the file, because your letters will be saved onto it.
The disc boots to the DOS 0: prompt. Type WDPRO and press ENTER. The disc holds three copies of the program, WDPRO, $WDPRO and WDPRO/M, and in our tests all three started the same program, so use WDPRO.
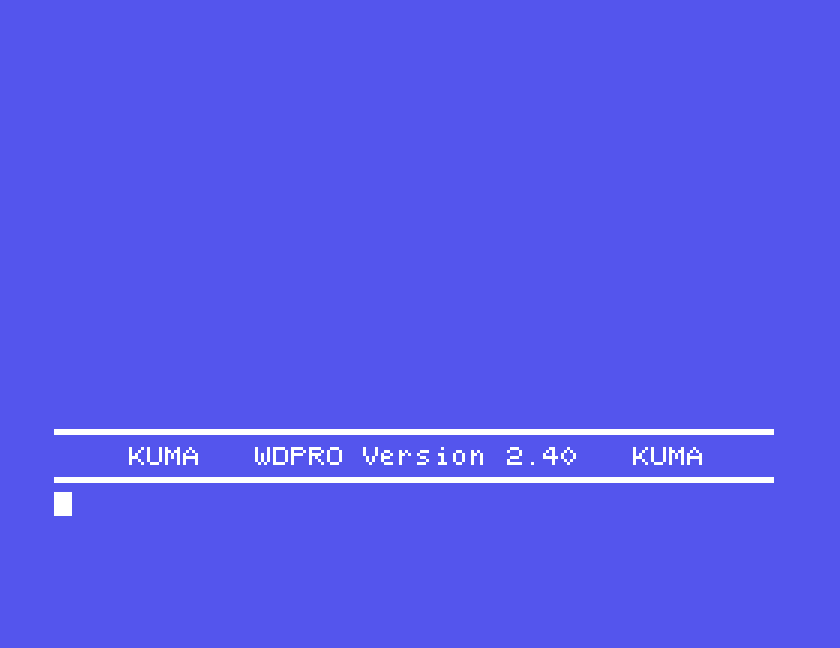
The screen is split in two by the banner. Above it is the text area, where your document appears. Below it is the command area, where you type commands such as SAVE and PRINT. The cursor starts in the command area.
That split gives WDPro its two modes:
ENTER on its own switches between them. Press it now and the cursor jumps to the top left of the text area; press it again and it goes back below the banner. That is the most important thing to know about WDPro, and the one most likely to catch you out, because it means ENTER never starts a new line in your text. How you get new lines and paragraphs comes under formatting, below.
Type something WDPro doesn't recognise in command mode and it says What?. The BREAK key abandons a command part way through, and WDPro says Break.
The format symbol. The ESC key doesn't escape from anything in WDPro. It types WDPro's special format symbol, which appears as a small blob on screen and marks the start of every format command. The manual and this guide write it as @. So when you see @p below, press ESC and then P.
Capitals. WDPro starts with small letters. Press SHIFT and ALPHA LOCK together to lock capitals on, and ALPHA LOCK on its own to turn them off again. ALPHA LOCK by itself never turns capitals on. The manual says that holding SHIFT with a letter gives a single capital. Under MAME it did not: every SHIFTed letter we typed came out small, however the keys were held, exactly as in Tasword. SHIFT does work with the number and punctuation keys, so !, ( and @ come out as they should. So for a capital in the middle of a sentence, lock capitals, type the letter, and unlock. We have not been able to try SHIFT on a real Einstein; if it works for you there, that is the manual being right and the emulation being different.
Moving the cursor. This is where a modern keyboard misleads you. The Einstein has two grey cursor keys, not four. One moves the cursor right, and left with SHIFT held. The other moves it down, and up with SHIFT. In MAME those two keys are on your Tab key and your Down arrow:
| To move the cursor | On a real Einstein | In MAME |
|---|---|---|
| right | the horizontal cursor key | Tab |
| left | SHIFT and the horizontal key | Shift and Tab |
| down | the vertical cursor key | Down arrow |
| up | SHIFT and the vertical key | Shift and Down arrow |
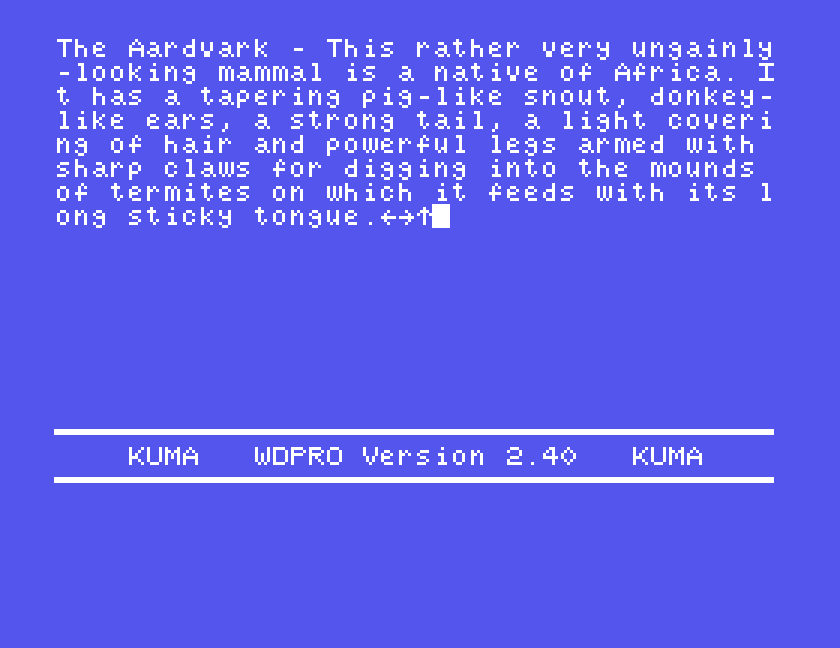
Your Left, Right and Up arrow keys are something else entirely. MAME maps them to three ordinary character keys whose legends are arrows, because the Einstein draws [, ] and ^ as arrows. Press them in WDPro and those characters go into your text:
The rest of the keys WDPro uses are on these host keys in MAME:
| Einstein key | In MAME |
|---|---|
| ENTER | Return |
| ESC (the format symbol) | Esc |
| BREAK | left Alt (Option on a Mac) |
| ALPHA LOCK | Caps Lock |
| GRAPH | F8 |
| CTRL | Ctrl |
| DEL | Backspace |
On a Mac, the function keys may need the Fn key held as well, and macOS normally keeps Ctrl with the arrow keys for its own window switching. If Ctrl and Down arrow does nothing in MAME, look under Keyboard Shortcuts in System Settings.
Press ENTER to get into edit mode, and type. Here is the practice passage from the manual:
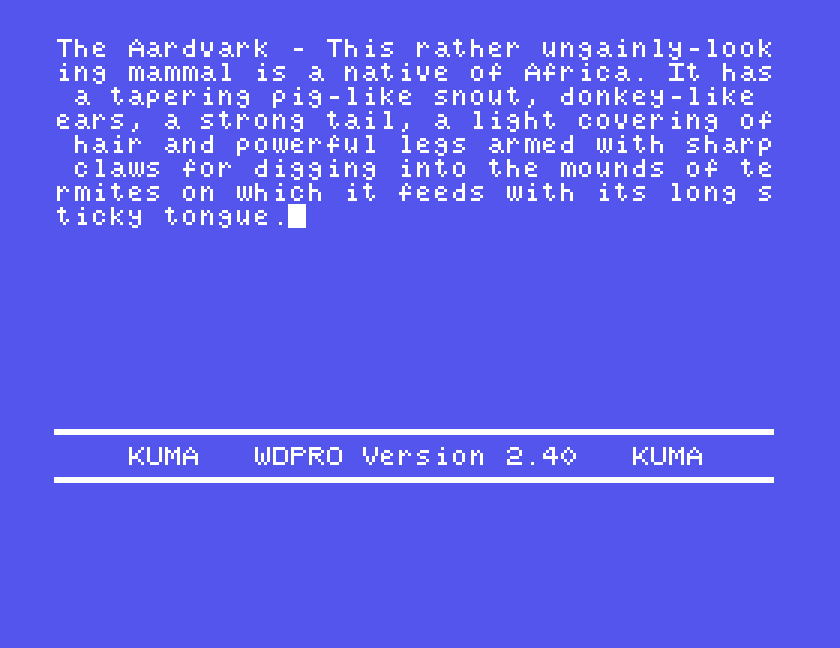
Two things look wrong but aren't. Words are chopped in half at the end of each row: "looking" is split across two rows, and so is "termites". WDPro's text area is not a page; it is your text as one long string, shown 40 characters at a time. The layout into proper lines happens when you print, so the split words on screen don't matter. And there are no new lines unless you ask for them with a format command.
If a split word bothers you while you are reading something back, CTRL and the , < key slides the whole text one character to the left under the cursor, and CTRL and the . > key slides it back. That changes only where the rows break on screen, not your text.
When you have finished, press ENTER to go back to command mode. The text stays in memory, ready to edit, save or print.
The cursor keys move one character or row at a time. Moving left from the start of a row takes you to the end of the row above. For anything further:
| Key | Moves the cursor |
|---|---|
| GRAPH | to the start of the text |
| SHIFT and GRAPH | to the end of the text |
| CTRL and the vertical cursor key | to the top left of the text area |
| CTRL and the horizontal cursor key | to the bottom left of the text area |
The manual's user guide says the bottom left needs SHIFT and the horizontal key, but SHIFT with that key just moves left. CTRL is what does it, as the manual's reference section says.
Typing in WDPro overwrites. Put the cursor on a wrong letter and type the right one over it.
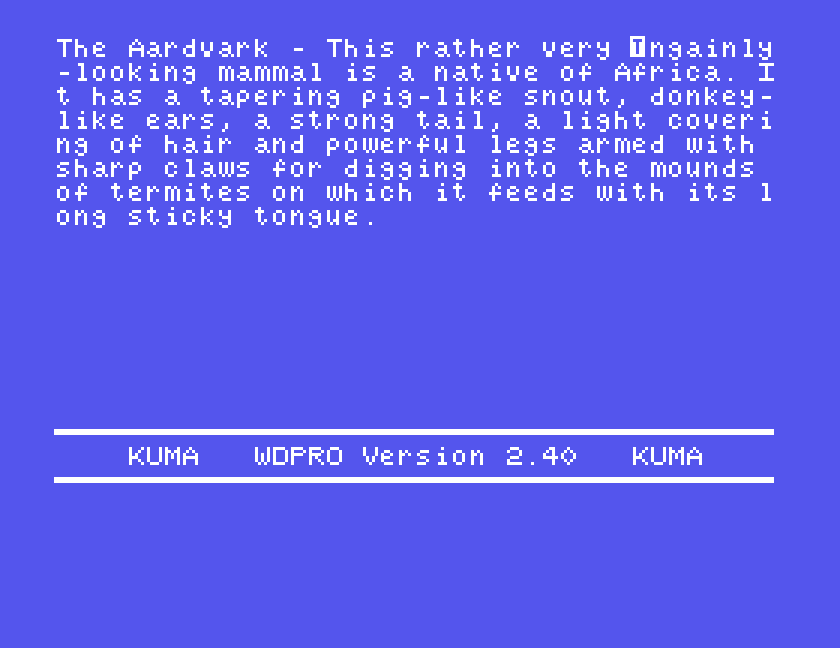
Save and load are commands, so they are typed in command mode:
| Command | Does |
|---|---|
SAVE/aardvark | saves the text as AARDVARK |
LIST | lists the WDPro files on the disc |
LIST/a* | lists only those whose names start with A |
NEW | clears the text from memory |
LOAD/aardvark | loads a file, adding it to the end of whatever text is already there |
LOAD/aard* | loads the first file whose name starts with AARD |
ERASE/aardvark | deletes a file from the disc |
RESET | tells WDPro you have changed the disc |
EXIT | leaves WDPro for the DOS 0: prompt |
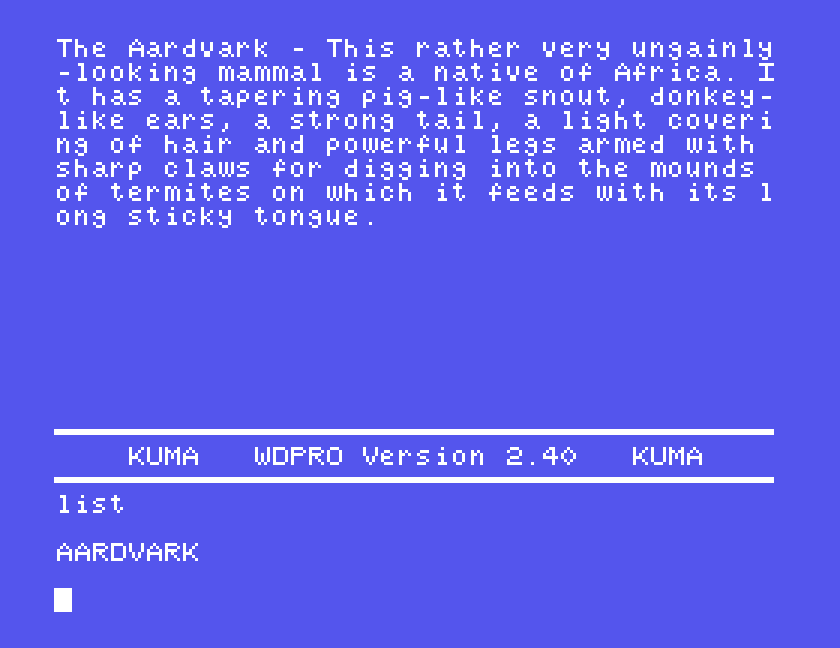
WDPro turns file names into capitals, and the manual allows up to eight characters.
The one to be careful with is LOAD. It doesn't replace your text; it adds the file to the end of it. We loaded the same one-line file twice and got two copies of the line. Type NEW before LOAD unless you really do want to join two files together, which is also how you reuse a standard paragraph or an address.
WDPro saves its files with the type .UFT, which you will see if you look at the disc with DOS or the disc tools. The file is your text exactly as you typed it, one long line with no line breaks, and the format commands are still in it.
The block commands are typed in command mode, and they then take you into the text, where you move the cursor to show WDPro where the block is.
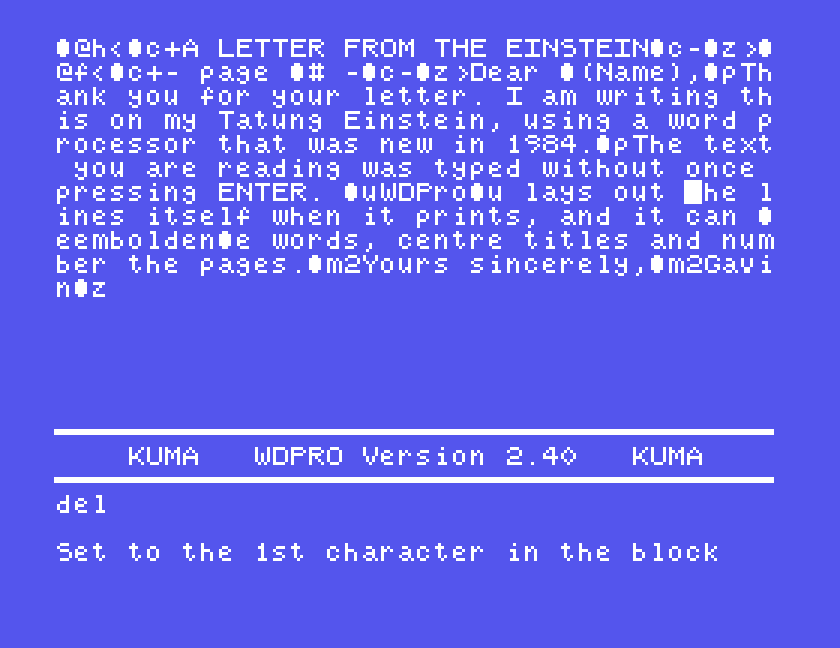
DEL deletes a block. WDPro says Set to the 1st character in the block. Move the cursor to the first character you want to delete and press ENTER. It then says Set to the last character in the block; move to the last character and press ENTER, and the block is gone.
MOVE and COPY mark the block in the same way, then ask for one more position: Set to the first character above the insertion point. WDPro talks about positions further on in the text as "above", so this means the character the block should go in front of. Put the cursor on it and press ENTER. We copied "the cat sat on the mat." and set the cursor on the first letter of "the cat and the dog", and the copy went in immediately in front of it.
If the position you choose is inside the block itself, WDPro refuses with Insert point is in the block.
Four commands search the text. The word you are looking for goes between slashes, and it can be up to 16 characters long.
| Command | Does |
|---|---|
FIND/dog | moves the cursor to the next "dog" and puts you in edit mode there |
FIND2/dog | moves to the second "dog" from the cursor |
SHOW/the | highlights each "the" in turn; ENTER moves on to the next |
REP/cat/bird/ | replaces every "cat" with "bird" |
REPC/dog/fox/ | stops at each "dog": Y replaces it, any other key leaves it |
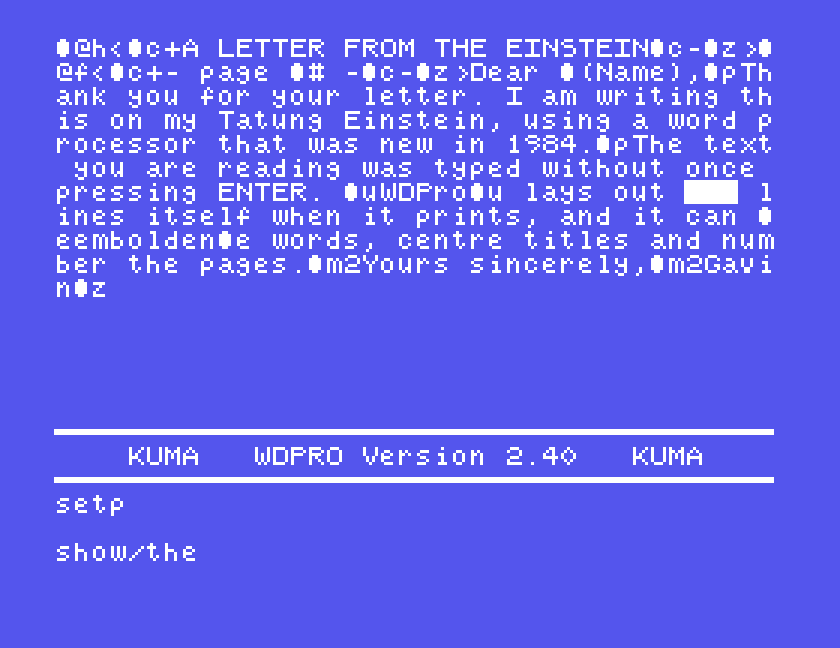
When there are no more matches, WDPro says End of file. Searches are case sensitive: FIND/THE found nothing in a text full of "the". FIND starts at the cursor, so press GRAPH in edit mode first if you want to search from the top.
Here is how you tell WDPro what the printed page should look like. Every format command starts with the format symbol, which is the ESC key. The letter after it can be a capital or a small letter.
The ones you will use all the time:
| Type | Does |
|---|---|
@p | starts a new paragraph: a blank line, then three spaces of indent |
@m | ends the line here |
@m2 | ends the line and leaves two blank lines |
@f | starts a new page |
@z | the end of the text. Always put this at the very end. |
@z matters more than it looks. WDPro stops printing when it reaches the first @z, so anything after it never appears, and without one, the manual warns, the printer may carry on with whatever is in memory.
Then the ones that change how text looks. Most are switches: + turns them on, - turns them off, and the letter on its own flips between the two.
| Type | Does |
|---|---|
@c+ ... @c- | centres the lines between them |
@j+ ... @j- | justifies: spreads out the spaces so the right margin is straight |
@u ... @u | underlines the words between |
@e ... @e | emphasised print for the words between |
@l10 | left margin at column 10 |
@r50 | right margin at column 50 |
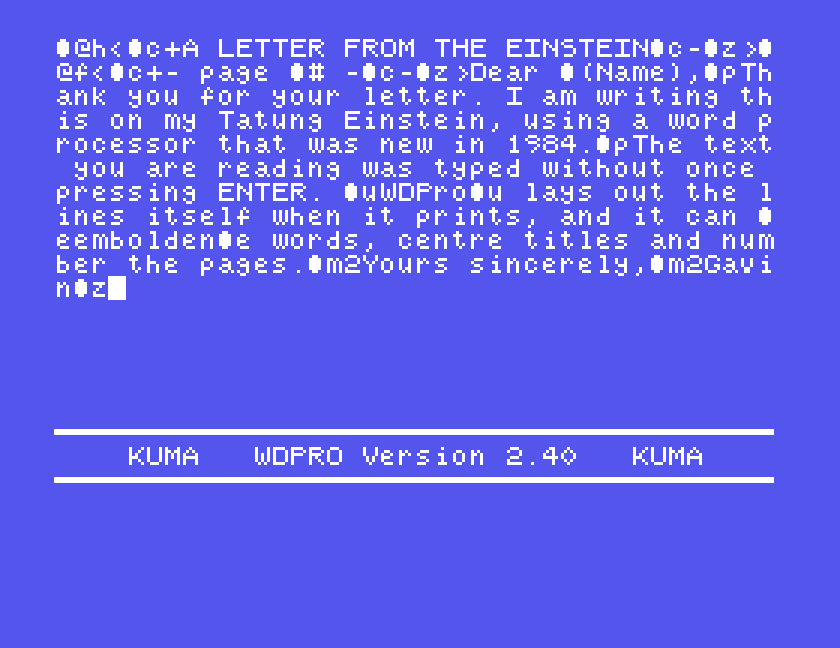
To centre a title on a line of its own, end it with @m: @c+A Letter from the Einstein@m2@c- centres the title, leaves two blank lines, and switches centring off. WDPro prints 80 characters to a line unless you change the margins.
Headers and footers go at the very start of the text. A header is @@h< followed by the text, @z, and >. The first @ is the ESC key as usual, but the second is an ordinary @, typed with SHIFT and the 0 @ key. The printed manual shows two format symbols there, and typed that way the header doesn't work: WDPro prints the words as ordinary text and then stops at the @z. A footer is the same with f. Inside either one, @# prints the page number:
@@h<@c+A LETTER FROM THE EINSTEIN@c-@z>
@@f<@c+- page @# -@c-@z>
The footer is printed when a page is finished. The last page of a short document isn't finished until you say so, so if you want a footer on it, end the text with @f@z rather than @z.
A question while printing. @(Name) stops the printing, shows Input: Name, and puts whatever you type into the printed text at that point. It is how you print the same letter to several people:
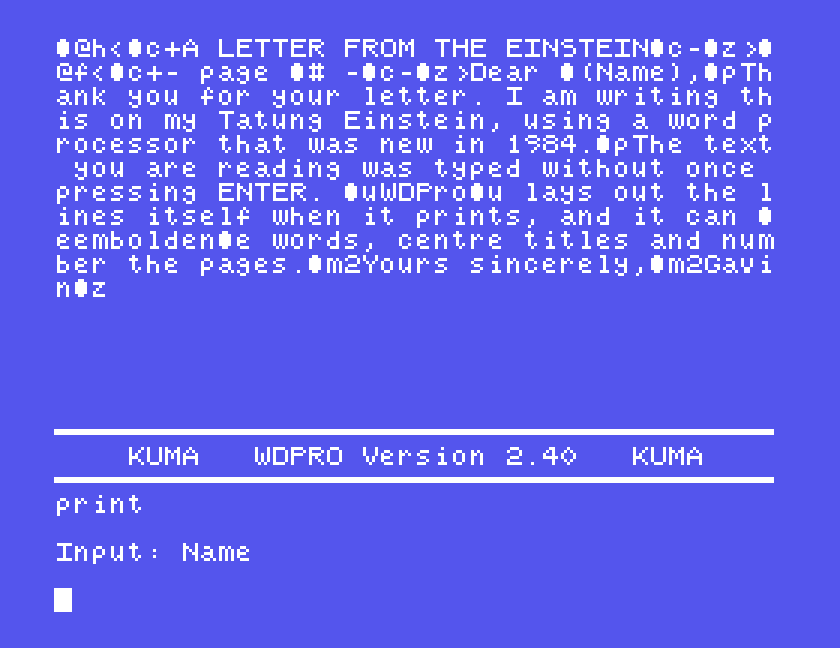
The rest, from page length to numbered paragraphs, tabs and sub-paragraphs, are in the manual's reference section. Two we have also checked: @N2,10,4 sets a page of 2 header lines, 10 lines of text and 4 footer lines, and @q5 makes the page numbers start at 5.
Type SETV and then PRINT, and instead of going to the printer, the formatted page appears on the screen:
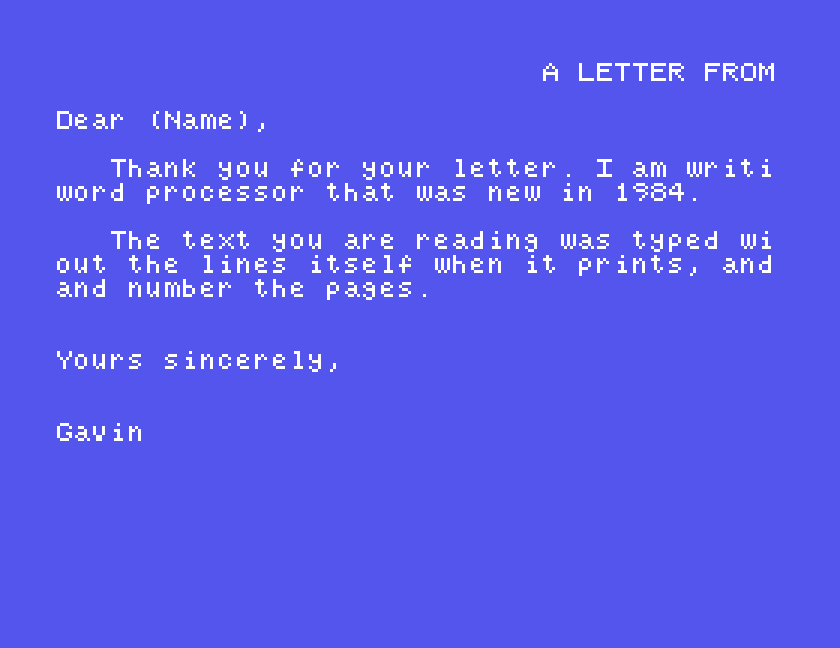
The page is 80 columns wide and the screen is 40, so you see the left half. The cursor keys slide the page about: SHIFT and the horizontal key slides it left, bringing the right hand side into view, and the horizontal key alone slides it back. SHIFT and the vertical key slides it up in the same way. ENTER goes on to the next page, and at the end back to your text. BREAK stops it at any point.
The preview doesn't ask @(Name) questions; it shows the prompt text in brackets instead, as in the picture. Type SETP to send PRINT back to the printer.
PRINT sends the text to the printer through the Einstein's Centronics port. PRINT2 prints two copies, asking any @(Name) questions again for each copy. SETD makes the next print double spaced for drafting, and SETS puts it back to single spacing.
The manual describes a CONFIG program for choosing a printer driver: Epson FX-80, MX-80, Shinwa, daisywheels, or a custom one. It is not on the library disc. Without it, WDPro prints in a plain way that needs nothing special from the printer: letters, spaces, carriage returns and line feeds, and nothing else. It still manages underlining by going back to the start of the line and printing underscores beneath the underlined words, and emphasis by printing those words a second time over themselves. On a line that has both, only the underline gets done.
Now the honest part. In 1984 you plugged in a dot matrix printer and it worked. Today you almost certainly do not own a printer with a Centronics port, and a modern printer cannot be connected to an Einstein at all. So what does printing mean now?
Under MAME, print to a file. Give MAME a Centronics printer that writes to a file, and everything WDPro sends to the printer lands there:
mame einstein -window -flop1 wdpro.mfi -centronics printer -prin letter.prn
Print as normal, and afterwards letter.prn holds the page exactly as the printer would have received it. This is the letter from the top of this guide, printed that way with Sam typed at the name prompt, and with the underline and emphasis passes left out:
                           A LETTER FROM THE EINSTEIN

Dear sam,

   Thank you for your letter. I am writing this on my Tatung Einstein, using a
word processor that was new in 1984.

   The text you are reading was typed without once pressing ENTER. WDPro lays
out the lines itself when it prints, and it can embolden words, centre titles
and number the pages.


Yours sincerely,


Gavin
The header is centred, the paragraphs are indented and every line fits in 80 columns. (It says "sam" because of the capitals problem above.) Open the file in a text editor and it looks like that, except for the underline and emphasis passes. A printer would have printed those on top of the line before, so an editor shows them as extra lines of underscores or repeated words.
On a real Einstein you need a printer with a parallel port. The plain printing described above is what you get from the library disc; the manual's CONFIG program, which the WDPro download page has more about, is what sets up the fancier drivers. If you have no printer, the disc is your printer: save the file, take the disc image off the machine, and pull the file out with the disc tools. The saved file is your text as typed, with the format commands still in it, so it is a draft rather than a finished page, but the words are all there.
Either way, SETV is the printer you always have. For checking a letter, a preview on the screen is often all you need.
Keys
| Keys | Does |
|---|---|
| ENTER | switches between command mode and edit mode; ends insert mode |
| ESC | the format symbol @ |
| BREAK | abandons a command or a preview |
| SHIFT and ALPHA LOCK | capitals on |
| ALPHA LOCK | capitals off |
| cursor keys | move; SHIFT reverses the direction |
| GRAPH, SHIFT GRAPH | start of text, end of text |
| CTRL and vertical key | top left of the text area |
| CTRL and horizontal key | bottom left of the text area |
CTRL and , <, CTRL and . > | slide the text a character left, right |
| DEL | rub out to the left |
| SHIFT DEL | insert mode; again for a space |
Commands (in command mode, then ENTER)
| Command | Does |
|---|---|
SAVE/name, LOAD/name | save; load, adding to the end of the text |
NEW | clear the text |
LIST, LIST/a* | list files |
ERASE/name | delete a file |
RESET | after changing discs |
DEL, MOVE, COPY | block commands; mark with the cursor and ENTER |
FIND/word, FINDn/word | go to the next, or nth, match |
SHOW/word | highlight each match in turn |
REP/old/new/ | replace every match |
REPC/old/new/ | replace with Y at each match |
PRINT, PRINTn | print, n copies |
SETV, SETP | print to the screen, to the printer |
SETD, SETS | double, single line spacing |
EXIT | leave for DOS |
Format commands (ESC, then the letter)
| Type | Does |
|---|---|
@p | new paragraph |
@m, @m2 | end the line; and leave blank lines |
@f | new page |
@z | end of text, and end of a header or footer |
@c+, @c- | centring on, off |
@j+, @j- | justification on, off |
@u, @e | underline, emphasis on and off |
@l10, @r50 | left margin, right margin |
@@h<...@z>, @@f<...@z> | header, footer; the second @ is SHIFT and 0 |
@# | page number, in a header or footer |
@q5 | set the page number |
@N2,10,4 | header, text and footer lines per page |
@(Name) | ask for text while printing |
If you have a real Einstein, we would like to know whether SHIFT gives you a capital in WDPro, and if you have a printer that still works, what it makes of WDPro's underlining and emphasis. The contact form is at tatungbytes.co.uk/contact.