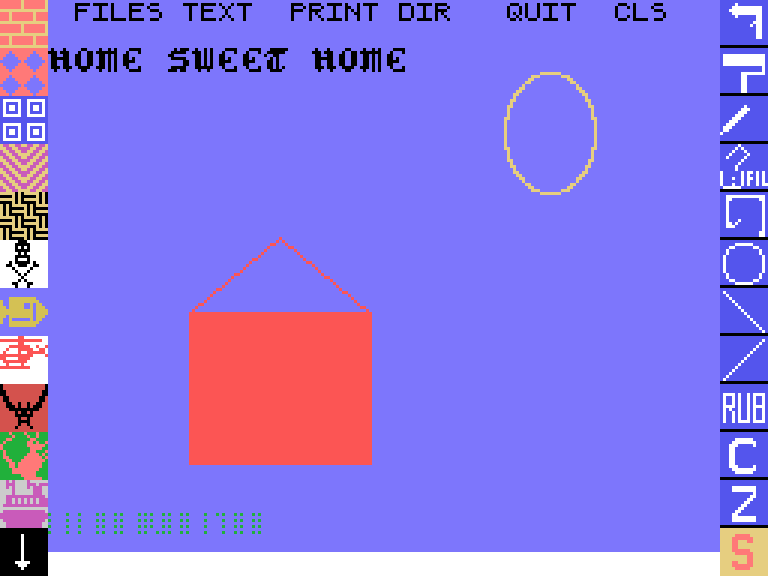
Mouse Art is a painting program for the Tatung Einstein, from EMSOFT of Ipswich. It came with something most Einstein owners never had: a mouse. The package's instructions describe plugging "the adapter lead" into the Einstein's user port, connecting the mouse to it, and taking the small sponge out of the bottom of the mouse before you start. With it you get a full screen canvas, fifteen colours, a spray can, a paint roller, lines, shapes, fills, five lettering styles, a zoom for pixel work, and a printout at the end.
This guide takes you through it today, mostly under MAME, where the emulated Einstein mouse can be driven by the mouse on your desk. Everything in it was done in MAME with the copies in our library: the Mouse Art disc, which is version 2.1 according to its READ.ME file, and the Mouse Art manual. The disc also carries a longer instruction file, MOUSE.INS, written for version 2.1; where the two disagree, this guide says what the program did.
On a real Einstein you need the disc and the Einstein mouse with its user port adapter. The manual says to hold the left mouse button down while switching the Einstein on, so that the mouse starts in the right mode. We have not been able to try Mouse Art on real hardware; if you have the mouse, we would like to hear from you.
Under MAME you need the Einstein ROM and the disc, set up as in Setting Up MAME. Convert the disc to MAME's .mfi format before you start, because MAME will not save to a .dsk image and you will want to save pictures; DSK, MFI and SCP explains how. Then tell MAME to plug the Einstein mouse into the user port with -user mouse:
mame einstein -window -user mouse -flop1 mouseart.mfi
The disc starts Mouse Art by itself. There is no need to hold a mouse button down in MAME.
This takes a small change to MAME's settings, because out of the box MAME connects the emulated Einstein mouse to a third mouse on your computer, which you almost certainly do not have. Your real mouse goes to the Einstein's analogue joystick port instead, which Mouse Art does not use. The two Einstein mouse buttons are on your right Ctrl key (left button) and right Shift key (right button).
The simplest fix is a small settings file. Make a folder, say mouseart-cfg, and in it a file called einstein.cfg containing:
<?xml version="1.0"?>
<mameconfig version="10">
    <system name="einstein">
        <input>
            <port tag=":user:mouse:mouse_x" type="P3_MOUSE_X" mask="255" defvalue="0" sensitivity="300">
                <newseq type="standard">MOUSECODE_1_XAXIS</newseq>
            </port>
            <port tag=":user:mouse:mouse_y" type="P3_MOUSE_Y" mask="255" defvalue="0" sensitivity="300">
                <newseq type="standard">MOUSECODE_1_YAXIS</newseq>
            </port>
            <port tag=":user:mouse:mouse_b" type="P3_BUTTON1" mask="1" defvalue="1">
                <newseq type="standard">MOUSECODE_1_BUTTON1 OR KEYCODE_RCONTROL</newseq>
            </port>
            <port tag=":user:mouse:mouse_b" type="P3_BUTTON2" mask="2" defvalue="2">
                <newseq type="standard">MOUSECODE_1_BUTTON2 OR KEYCODE_RSHIFT</newseq>
            </port>
            <port tag=":analogue_1_x" type="P1_AD_STICK_X" mask="255" defvalue="128">
                <newseq type="standard">NONE</newseq>
            </port>
            <port tag=":analogue_1_y" type="P1_AD_STICK_Y" mask="255" defvalue="128">
                <newseq type="standard">NONE</newseq>
            </port>
        </input>
    </system>
</mameconfig>
Then start MAME with that folder and with -mouse, which tells MAME to read your mouse:
mame einstein -window -mouse -user mouse -cfg_directory mouseart-cfg -flop1 mouseart.mfi
Click once in the MAME window so that it takes the mouse. The diamond pointer now follows your mouse, the left button draws and the right button brings up the colours. We tried this on a Mac: it works. At MAME's normal setting the pointer crawls, which is why the file raises the sensitivity to 300; change that number to suit your mouse. Use a proper mouse with two separate buttons if you can. Mouse Art uses both all the time, and a laptop trackpad makes it hard work.
Quit MAME with its window's close button or Cmd+Q (Alt+F4 on Windows). While MAME has the keyboard, Esc goes to the Einstein.
Mouse Art was written so that it could also be driven without a mouse, and every step in this guide was first done that way. The cursor keys move the pointer one pixel at a time and speed up if held; ENTER is the left button and the H key (for "hue") the right. In MAME the Einstein's two cursor keys are on your Tab key and Down arrow, with Shift reversing each, and ENTER is Return.
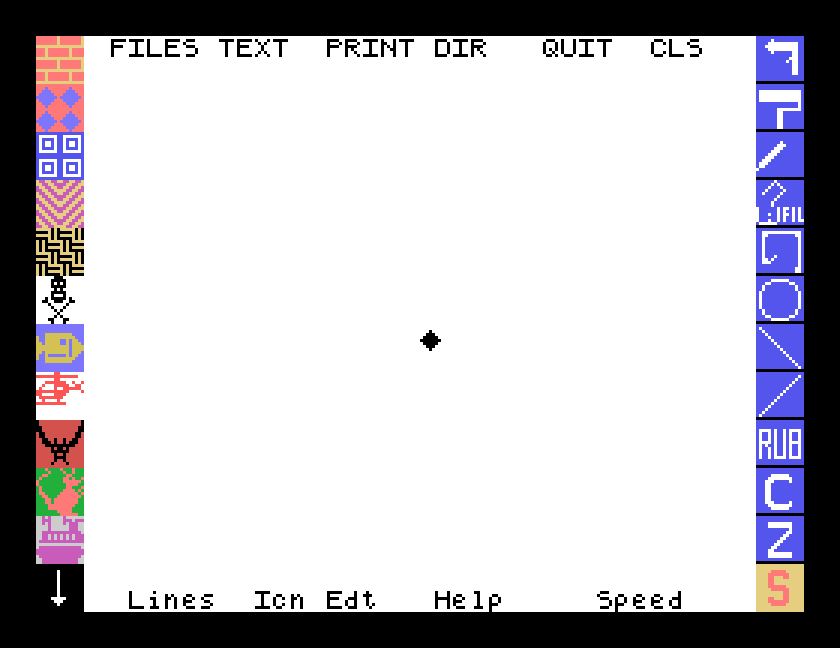
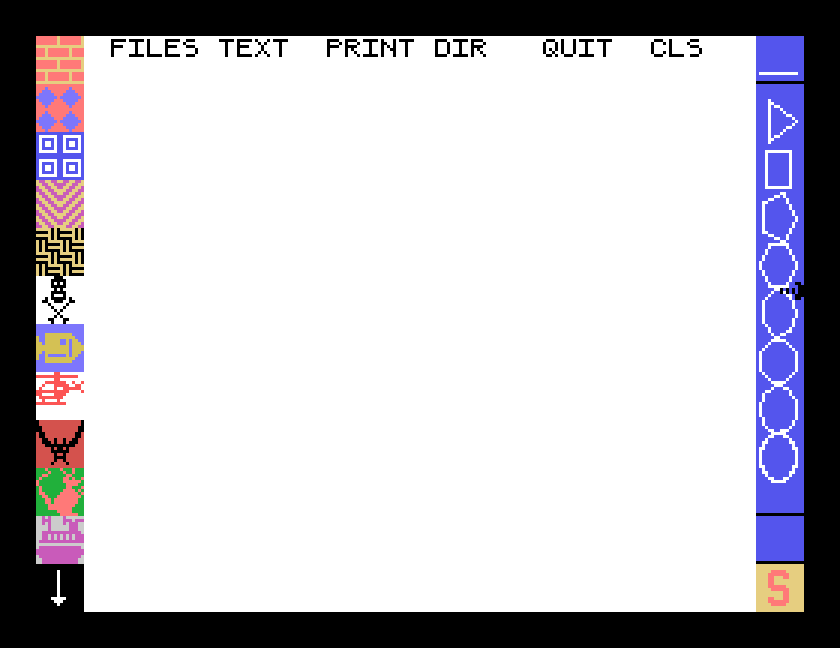
The white area is your canvas. Around it:
To choose anything, move the pointer onto it and press the left button. When you have finished with a tool, press Q to go back to Select mode and the diamond pointer. Q does nothing while a tool is waiting for you to pick one of its options, or halfway through a line; finish that step first.
Press the right button (or H) and the top row changes to Cursor Fore Back Canvas Invers. Click one, and a strip of fifteen colours appears across the top:
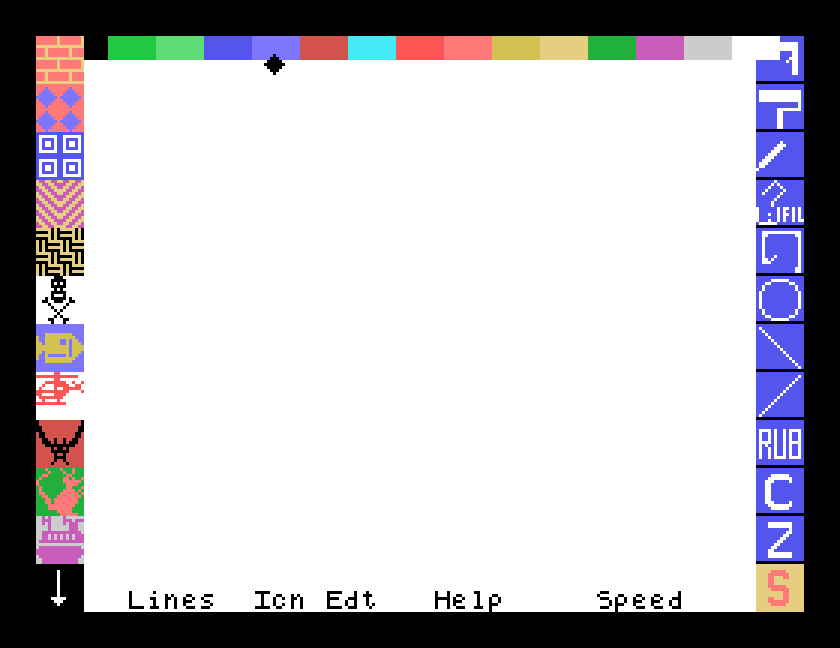
The Einstein can only show two colours in each row of eight pixels, and Mouse Art works within that. The manual's technical notes explain the consequence: draw a line of a third colour across two others and you will get a small blemish where they meet. Keep different colours a little apart and it rarely shows.
Down the right hand side, from the top:
| Tool | What it does |
|---|---|
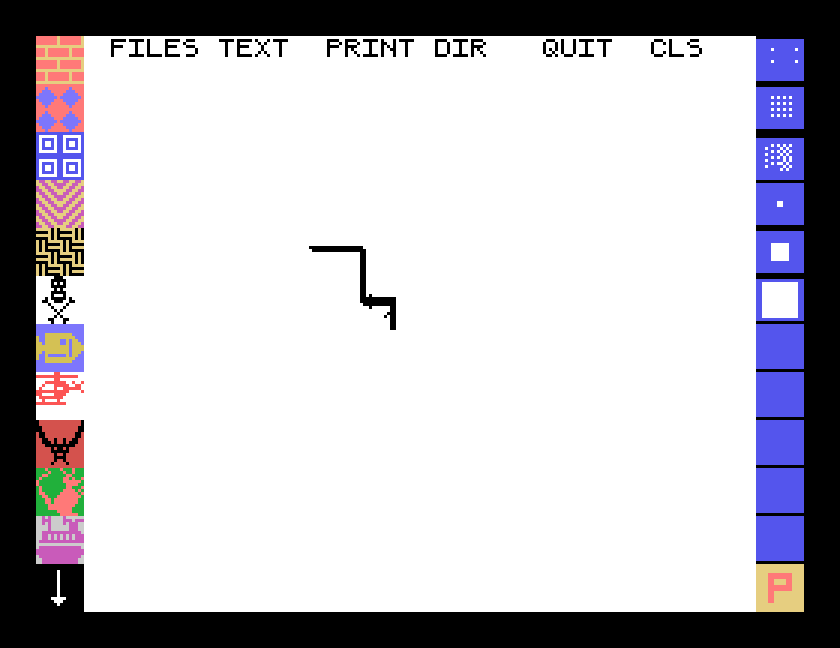
| Spray can | Choose one of six spray patterns (three dotted, three solid of different widths), then press the button to start spraying and again to stop |
| Roller | Choose a pattern from the left hand column; each press of the button rolls a copy of it out beneath the roller |
| Pen | Freehand drawing: the button starts and stops the line. R turns the pen into a rubber |
| Fill | Put the + pointer inside a closed shape and press the button to fill it |
| Rubber band | Straight lines: press at the start, press at the end. Press again to start the next line from there |
| Shapes | A menu of nine shapes, from a straight line and a triangle to polygons with more and more sides; the last is as good as a circle. Press to draw a small one, then P to grow it |
| \ and / | Short diagonal lines at exactly 45 degrees, one each way, drawn wherever you press |
| RUB | A rubber in three widths, used like the spray can |
| C | Copy: press over an area to pick it up, and press again where the copy should go |
| Z | Zoom: press over an area and a magnified copy appears in the opposite corner for pixel-by-pixel work. Q puts it away |
Here is how the picture at the top of this guide was made, one step at a time.
The sky. Right button, Canvas, light blue. The whole canvas turns blue.
The house. Right button, Fore, red, then the right button again. Choose the rubber band. Press the button at one corner of the house, then at the next corner, then press again to start the next line from there, and so on round the walls and up over the roof. After the last corner, don't press again: press Q. Now choose Fill, put the pointer inside the walls and press the button. The walls fill red. If a fill ever leaks out through a gap in the outline, the manual says to press R straight away, before you leave the tool, to put the picture back.
The sun. Set the colour to light yellow the same way. Choose the shapes tool, and from its menu the last shape, the one with the most sides.
Press the button where the sun should be and a small circle appears. Press P a few times and it grows. On screen it is an upright oval, because the Einstein's pixels are not square. Printed, it comes out close to round.
The grass. Colour dark green, spray can, a dotted pattern, then spray along the bottom.
The title. Colour black, then TEXT at the top. The patterns down the left are replaced by five fonts, F1 to F5. Click one and type. ESC finishes.
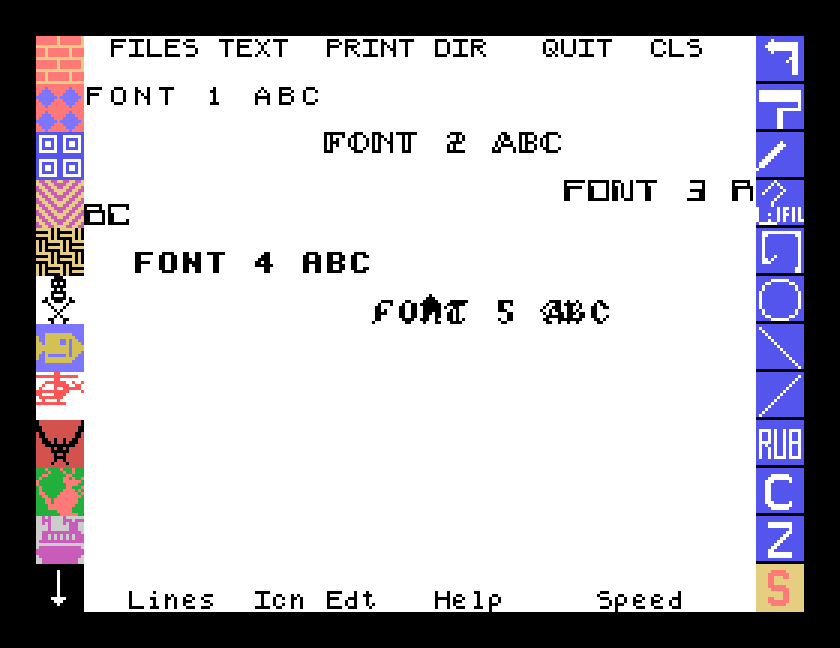
Two things about text. The Einstein starts with ALPHA LOCK on, so everything comes out in capitals until you press ALPHA LOCK (Caps Lock in MAME). And, the instructions say, there is no insert: DEL rubs out to the left.
Click FILES. Mouse Art asks for a file name first, then 1 to LOAD, 2 to SAVE. 1 OR 2 ?.
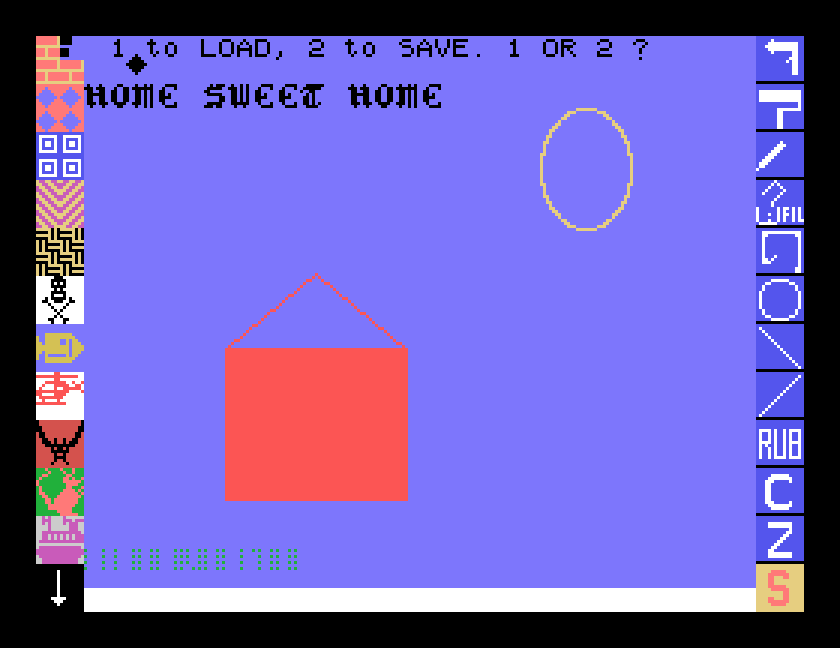
Give the full name, with a type if you like: we saved ours as HOUSE.PIC. The instructions say a name can start with a drive, 1:HOUSE.PIC. The manual warns about one bug: if you save over a name that already exists and do not want to, press ESC rather than N.
DIR asks which drive, lists the disc, and waits for a key. CLS clears the canvas after asking Clear Screen - confirm y/n. QUIT asks return to DOS ? - Confirm Y/N and leaves you at the 0: prompt.
A saved picture is the whole screen, 12,416 bytes, and that includes the icons around the edge: Mouse Art draws them into the picture itself. The files are a straight copy of the Einstein's screen memory, which is how we turned ours into the image at the top of this page.
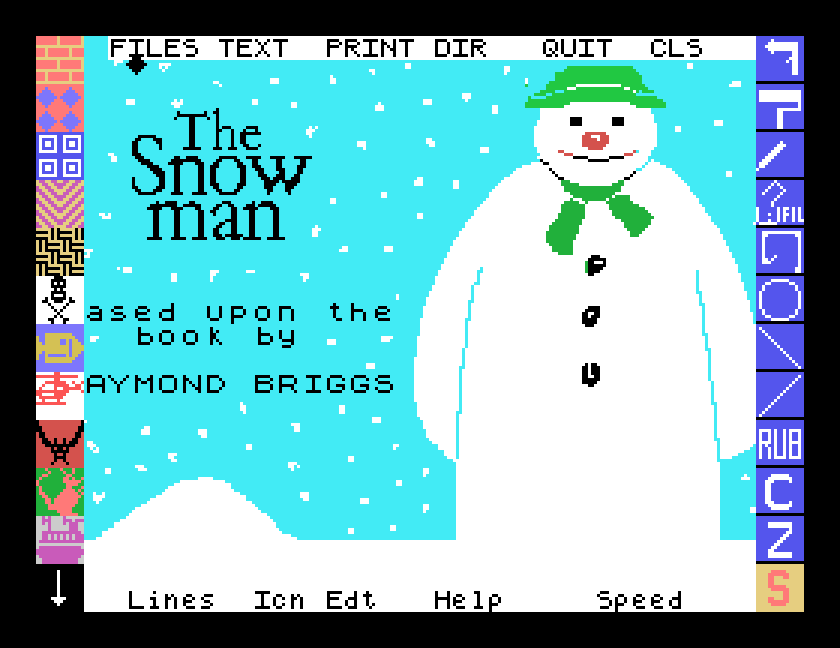
The disc comes with four pictures to load: SC2, SC3, SC4 and SC5. They are loading screens from other publishers' games, among them 180!, a forest archer, Quicksilva's The Snowman and Gargoyle Games' Sweevo's World, and they show what the screen can do in skilled hands.
PRINT asks two questions. First, 1 for Black & White or 2 for Colour Paterns: in colour pattern mode each colour becomes its own pattern of dots, so a colour picture still makes sense on a black and white printer. Then the size, as one of four printer drivers:
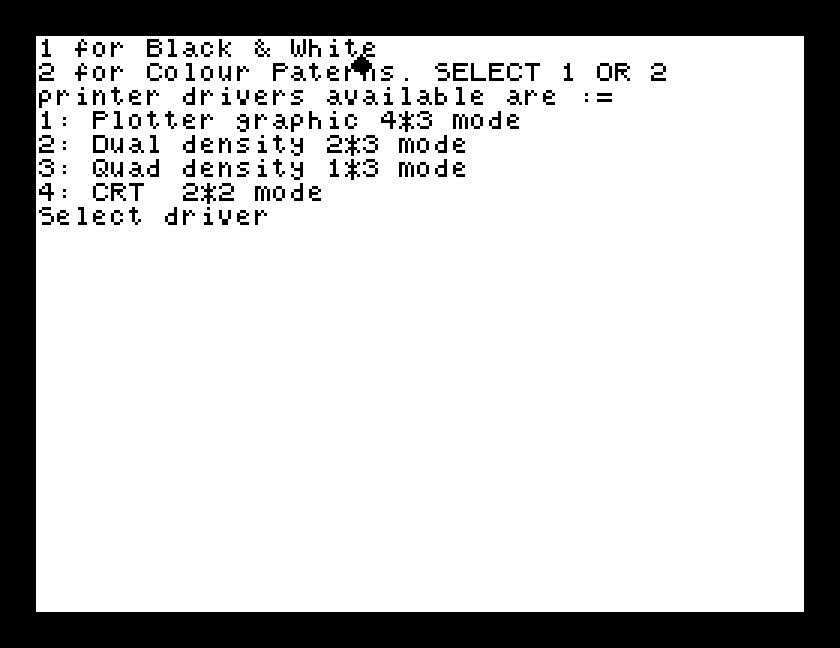
The manual says driver 1 gives the biggest printout and driver 4 the smallest. The printer has to be Epson compatible; the disc's MSEINSTL program sets Mouse Art up for others. To stop a printout, hold the space bar down; the READ.ME warns against ENTER, because that is the left mouse button.
Today you almost certainly do not own a printer the Einstein can talk to. Under MAME, print to a file: add -centronics printer -prin picture.prn to the MAME command, and everything Mouse Art sends to the printer lands in picture.prn. What arrives is Epson dot graphics, not text, so you cannot just open it, but it is exact. We turned ours back into a picture of the paper:
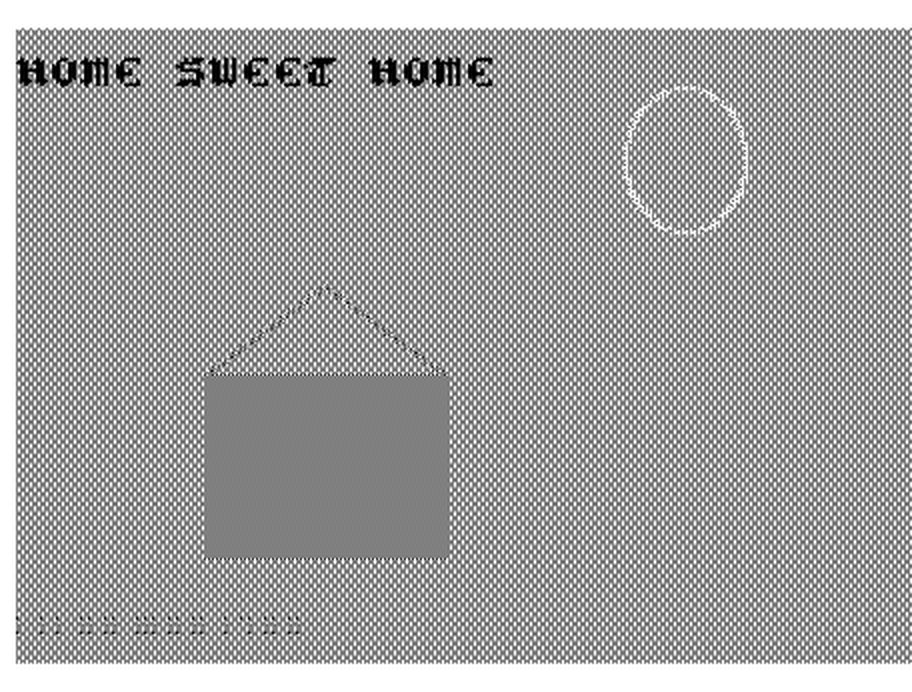
Two things show up. Mouse Art prints the picture sideways, and only the canvas: the icons are left off. And the sun, an upright oval on screen, is nearly round on paper.
On a real Einstein without a printer, the disc is your printer: save the picture, take the disc image off the machine, and the file is a copy of the screen.
Along the bottom of the screen are four more options: Lines (the style of line drawn), Icn Edt (an editor for the icons themselves), Help and Speed (the pointer speed). The instructions say to move the pointer just above one and press the button. In our MAME setup, driving the pointer from the keyboard, none of them responded. If you get them working, please tell us how.
| Key or button | Does |
|---|---|
| Left button, or ENTER | choose; start and stop drawing |
| Right button, or H | colour menu: Cursor, Fore, Back, Canvas, Invers; again to go back |
| Cursor keys | move the pointer a pixel at a time; hold to speed up |
| Q | finish with a tool, back to Select |
| R | the pen becomes a rubber; after a fill, undo it |
| P | grow the shape just drawn |
| ESC | finish typing text |
| ALPHA LOCK | capitals on and off in text |
| Status box | S select, M move, P plotting, R rubber |
MOUSE.INS, READ.ME and MSEINSTL.DOC files describe version 2.1 and the printer setup. The disc also has MSEDRV.XBS and MSELOAD.XBS, for using the mouse and your pictures in your own BASIC programs.If you have a real Einstein mouse, we would like to know how it compares, and whether Help, Lines and Speed work for you. The contact form is at tatungbytes.co.uk/contact.